4.3. Object Properties
The properties of an object control it's appearance. Properties include text font and appearance; line width, style, and color; transparency (i.e., draw background yes or no); foreground and background color; and any other settings that control the way an object is displayed. Different types of objects have different sets of properties.
The specific properties of an object are determined in two different ways. The default settings in force at the time the object is added to the canvas determine the object's initial properties. Once objects are placed onto the diagram, their properties may be set using the Properties dialog box for the object or for a group of objects.
4.3.1. Sources of Default Properties
An object's default properties are set in two places within Dia. First, as discussed above in Default Color, Line Width, and Line Style, default values for the foreground and background color; the line width; and the line style of all basic objects and some special objects are determined by settings on the Toolbox. For basic lines, the default beginning and ending arrow styles are also determined by the Toolbox settings.
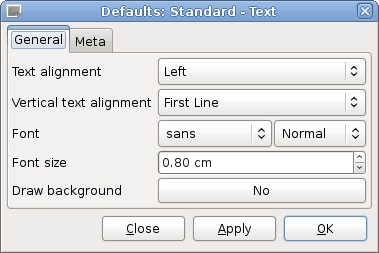
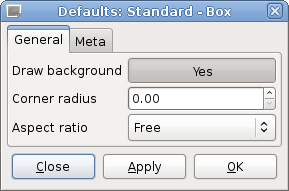
The rest of an object's default properties can be set using the Defaults: Properties dialog box for each object. This is opened by double-clicking on the object's icon on the Toolbox. Since the available properties for each type of object can be different, each object's default properties dialog is different. Below are examples of the default properties dialog for the basic Text and Box objects.
Figure 4.36. Default Text Properties

Figure 4.37. Default Box Properties

For objects that include text, the dialog will normally include the text alignment, the font name, the font modifier (normal, bold, etc.), and the font size (in centimeters, not points). This makes it possible to set defaults for text display for any object that can contain text.
4.3.2. Changing Object Properties
Once objects are placed onto the diagram, their properties can be changed either individually or as a member of a group.
4.3.2.1. Changing Properties for One Object
To change the properties of an individual object, either double-click on the object or select the object, right-click to display the context menu, and select the Properties option. In either case, the Properties dialog for the selected object will display, allowing you to change any of the object's properties.
![[Note]](images/note.png) | |
If multiple objects are selected, you can still change the properties of one of the selected objects by double-clicking that object. This will only change the properties of the one object you double-clicked. |
4.3.2.2. Changing Properties for a Group of Objects
You can change the properties of a group of objects at one time by selecting two or more objects and then selecting → to create a group. Once the group is created, you can set properties for all objects in the group. To do this, either double-click on the group or right-click to display the context menu and select the Properties option. The Properties: Group dialog will display. Only properties that pertain to all of the selected objects will display in the dialog. If your group contains only objects of one type, then all of the properties for that object type will display.
For example, if a group contains all basic Line objects, all of the Line properties will display in the Properties: Group dialog. If a group contains a basic Line and a basic Box, the Properties: Group dialog will only show Line width, Line color, and Line style, since these are the properties these objects have in common.
Changing properties for a group is a powerful feature of Dia. For example, say you have a large diagram and you need to change the line style of all the basic Line objects everywhere in the diagram. You can accomplish this easily with the following steps.
- Select one basic Line object.
- Use → to select all of the basic Line objects on the diagram.
- Use → to create a group for the selected objects.
- Double-click on the group and make your property changes.
- Use → to remove the group.
With this technique, you can quickly change the properties of many objects. This also works with selections containing multiple object types, as long as all of the selected objects have the properties you want to change.